In high school, there was no shop class. Sometimes I'd work on a project in the garage with my dad. Most of his tools are older, corded, and often uncooperative.
I remember using saw-horses that wobbled— and a slightly rusted Skilsaw — to cut down ply for a Boy Scouts derby car. It had a hand-brake and a rope for steering.
My dad seemed to stub his fingers and rake all the splinters into his hands anytime we worked with wood or tools. There was always a lot of cursing and frustration; and sometimes I hated being out there with him. Now, more or less, I look on those memories fondly...
Wood, Metal and Modeling
Eventually, I left McHenry, Illinois to study architecture at college. I finally had the opportunity to use a full-fledged shop. For the first time, I had access to the same power-tools professional contractors might use— saws, drills, welders and more.
Over the summer, I started working at Bridgewater Studio in Chicago. Beginning mostly as a finisher (sanding and painting), and eventually coming back with more carpentry and computer-aided manufacturing (CAM) experience.
In my third and fourth years of undergrad, I started using modeling tools to produce GCODE and other machine-readable codes. This language, used for computer numerical control (CNC) is a standard for 3D printers, laser-cutters, and mills.
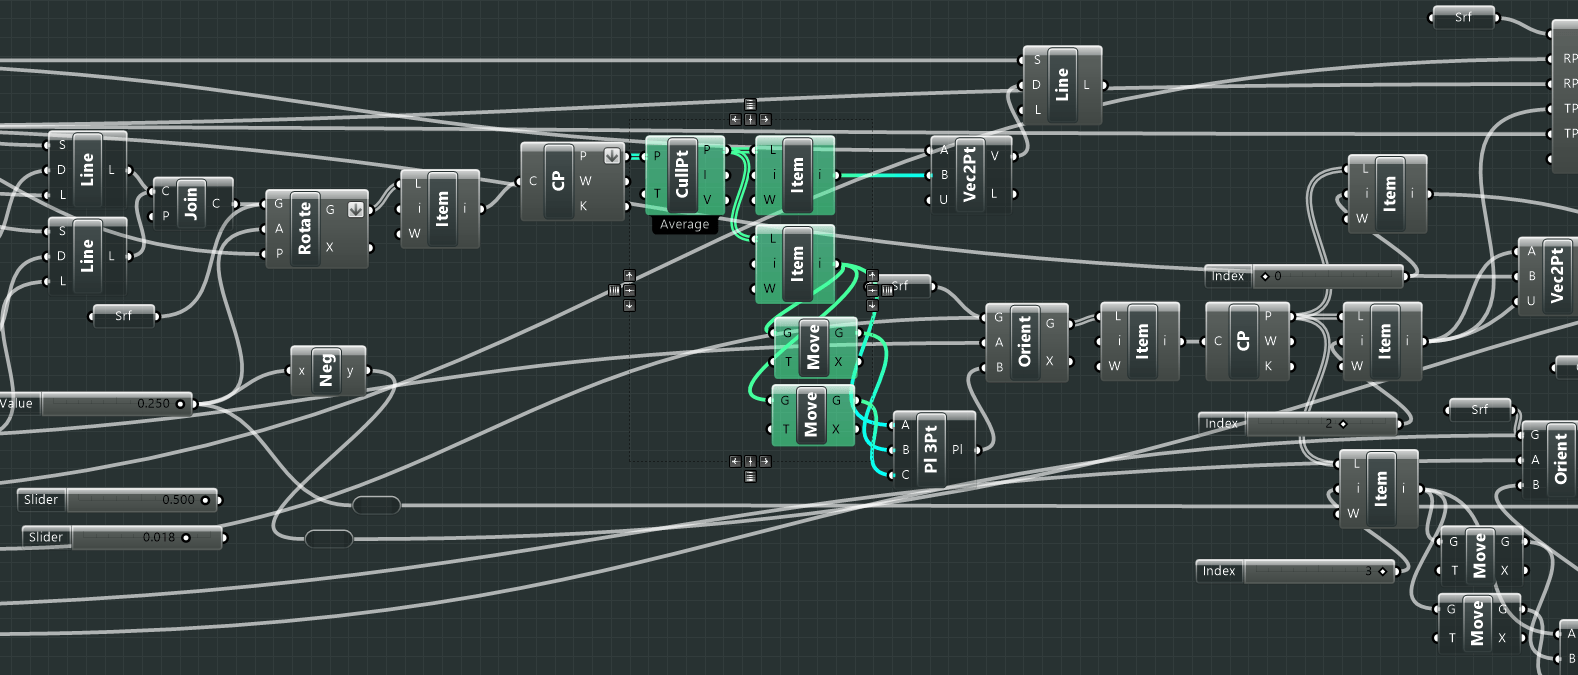
I also learned to use parametric modeling (also referred to as algorithmic modeling) in the popular plug-in, Grasshopper3D , for Rhinoceros .
Grasshopper is essentially a visual-programming framework that uses graphical nodes (components) and wires to connect variables. It is a powerful digital tool and extraordinarily extensible.
Industrial Manufacturing Robotics
Under professor Jenny Sabin , I used the Grasshopper plug-in, HAL , to model and simulate toolpaths for a popular ABB robot .
Together with my partner, Thanh Nyugen , we designed a green facade system. The stringy, nest-like structure was achieved by depositing a starch-based bio-plastic with a custom pneumatic extruder.
Additionally, in Jenny's Digital Ceramics elective, I also CNC'd plaster molds for slipcasting high-accuracy, repeatable ceramics.

Continuing with Digital Design & Fab
Now, as a professional designer and digital fabricator at Iontank (at the time of writing), I help take models from computer screens out into the world.
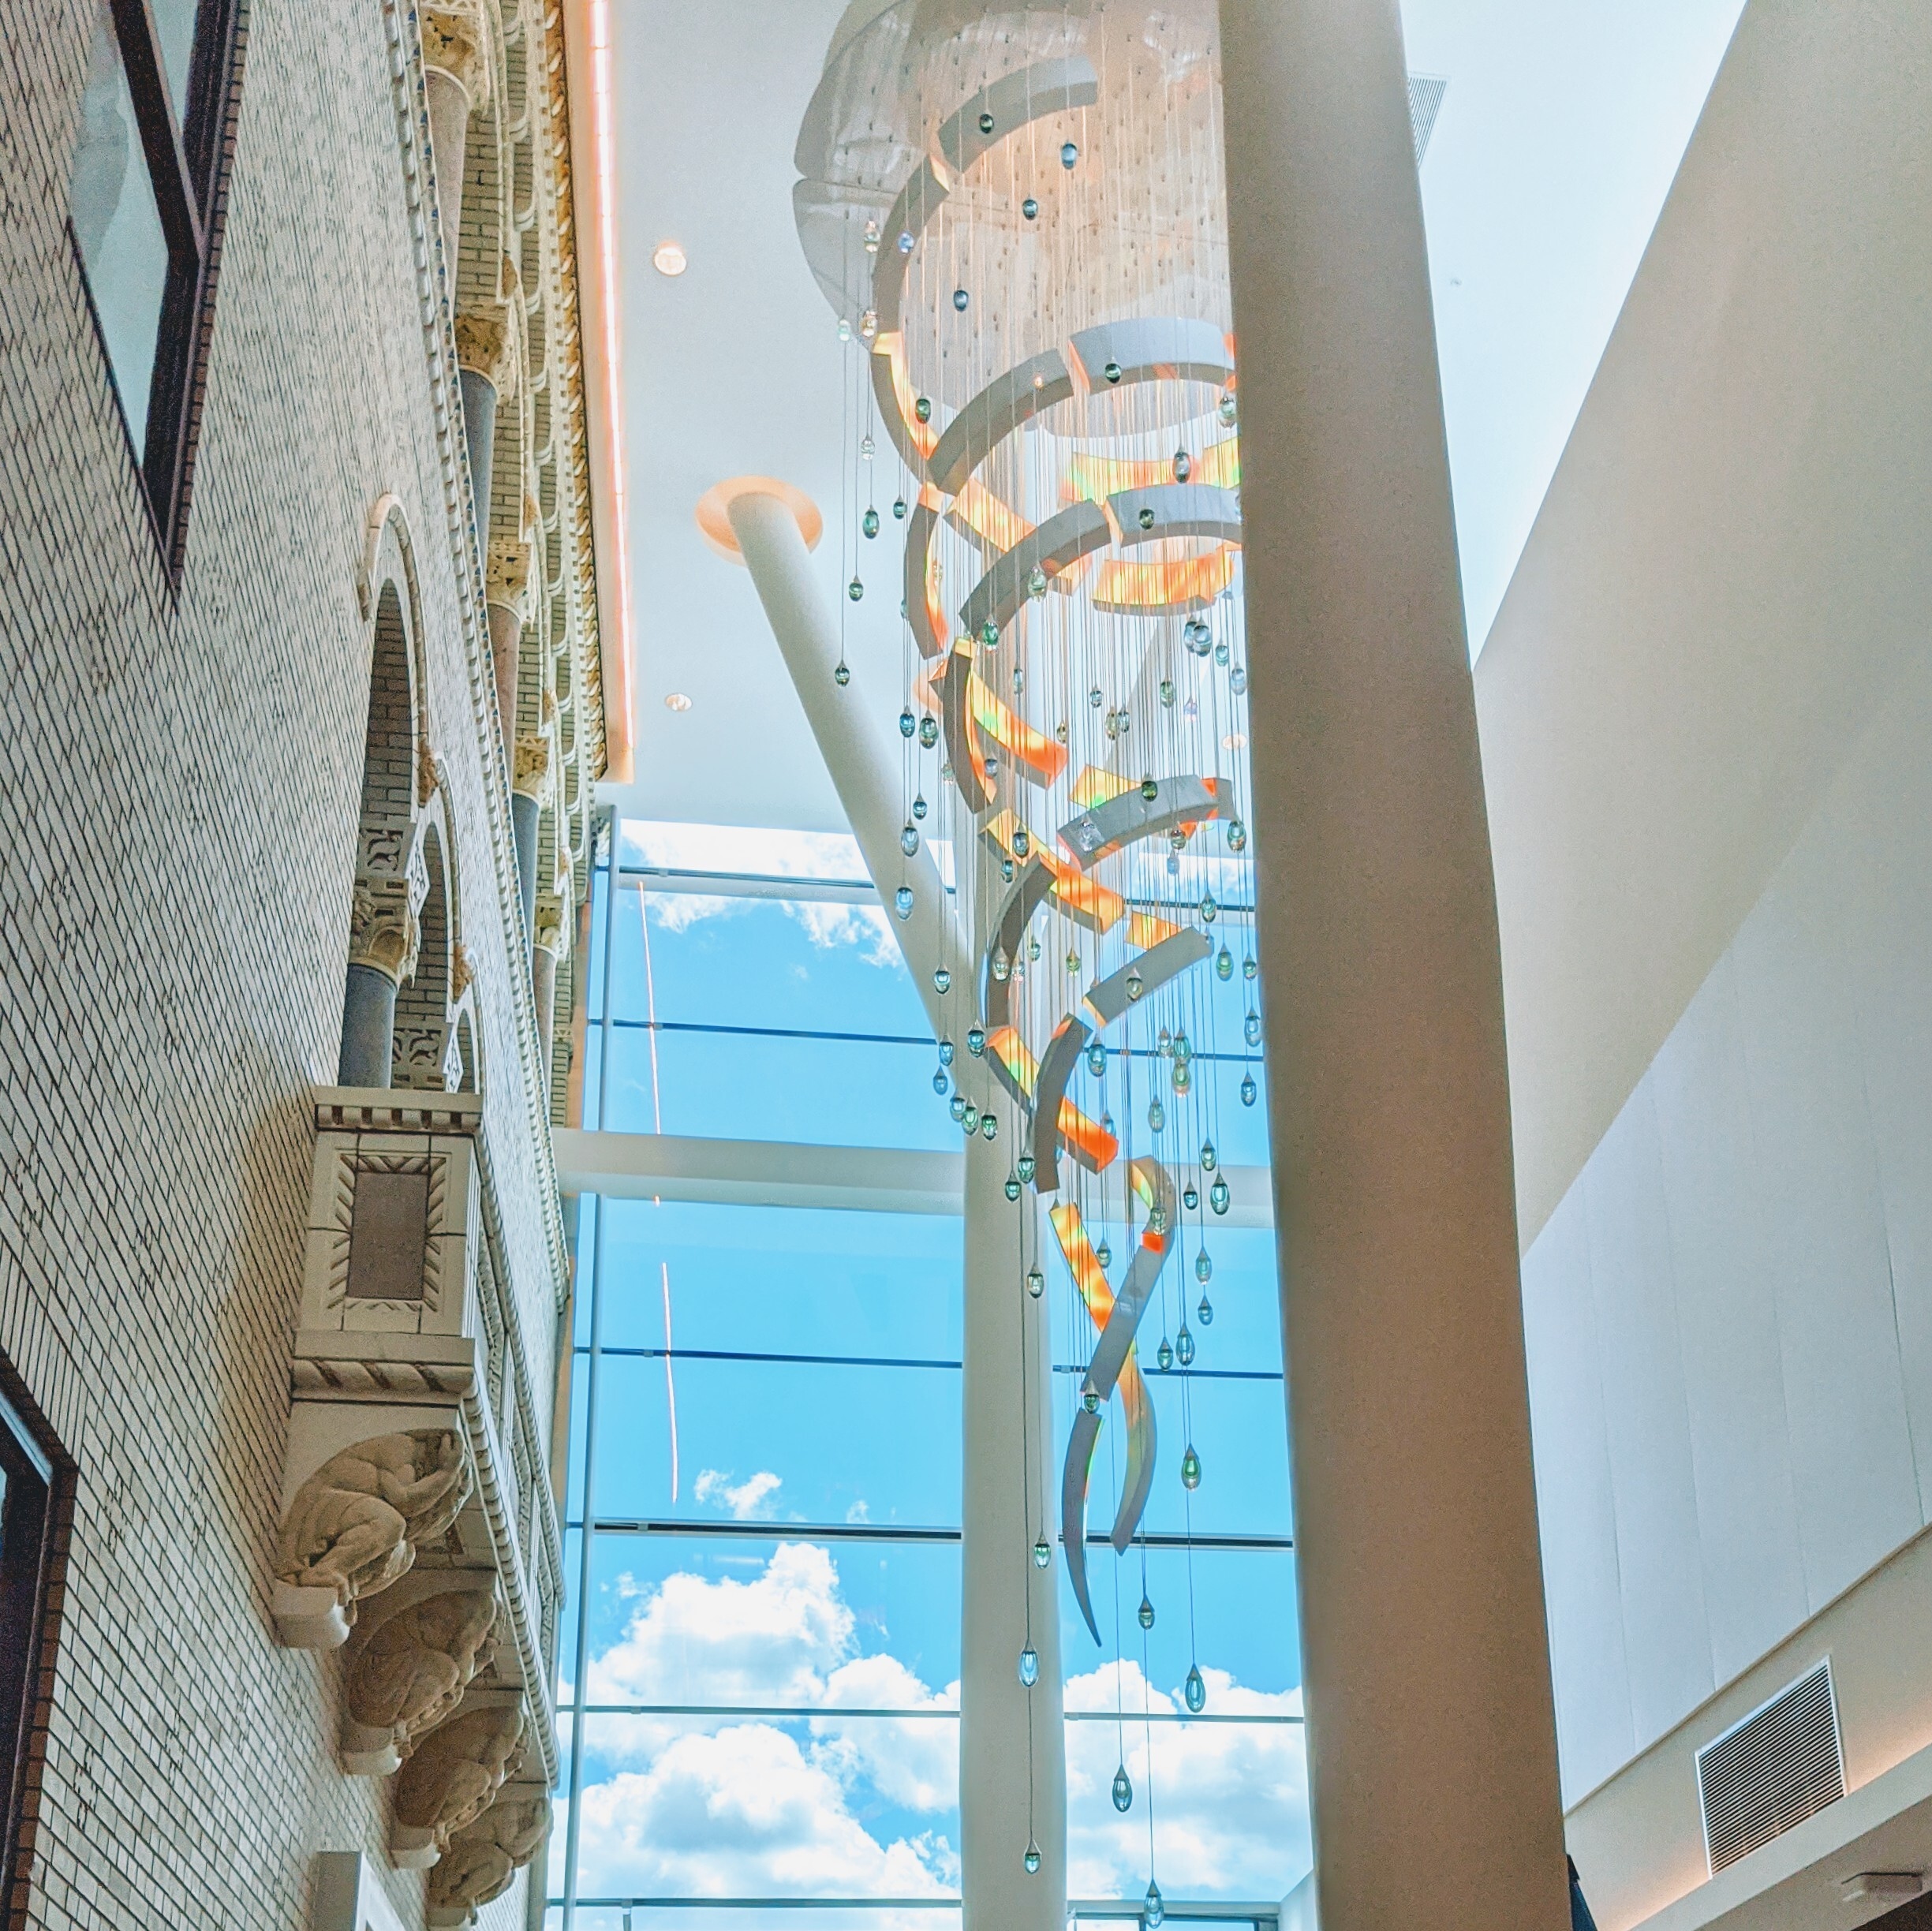
In this recent project— a chandelier-like sculpture residing in a forty-foot-tall hospital atrium— I used Grasshopper to array and analyze each of the 150 individual hanging elements. The parametric modeling plugin allowed me to filter, predict, and output the relative wire lengths and hanging location of each part.
The line-work from the 3D model is also used for exporting GCODE in RhinoCAM — by far the most user-friendly CAM plugin for Rhino3D. The GCODE provides a collection of XYZ coordinates, tool changes, router RPMs, and travel speeds.
Designing a Microfactory
As DIY fabrication tools become more affordable and capable, I've become engaged with the idea of building my own home microfactory . The concept behind a microfactory is that it minimizes the need for holding inventory.
Instead of stocking a supply of diverse products— without knowing exactly which will be purchased— the microfactory can deliver a set range of products that are rapidly and autonomously produced from a stock of raw materials (filament, sheet goods, etc.).
The success of a microfactory therefore depends on optimizing for the most diverse and desirable set of products from a minimal amount of raw materials and manual labor. The microfactory itself is then re-produced at scale, slashing the cost of stocking and delivering to hard-to-reach locales.
To achieve high degrees of automation, I'm interested in designing and constructing a mid-scale 6-axis robotic arm. I'd like this machine to be capable of high-degrees of manipulation (pick-and-place) as well as rigid enough to mill hardwoods— potentially soft metals.
Conclusion
For electronic products, it makes sense that I could stock a narrow set of programmable components (like single-board computers, or SBCs). I'll also likely need a high-resolution 3D printer. SLA printers, like those made by Formlabs provide an incredible finish with little post-processing.
This will be a slow project, but I'm optimistic. The ultimate goal is to have a few highly extensible tools (robot, 3D printer, and a mill), while stock-piling only a few electronics, filaments, sheet goods, resins, and other "raw" materials.

