A DIY Home Shop
During my undergrad in architecture, one of the things that most excited me was the opportunity to work in a fabrication shop. At the time, my school had a modest metal shop and a slightly more expansive wood shop.
They also provided students with two 3-axis CNTMotion CNC mills— each with a 5x10' bed. I've used these machines professionally as well, and (while they cost as much as a new Porsche) they're really well-built tools.
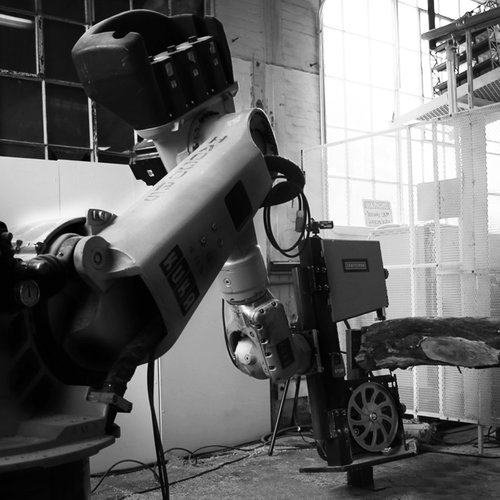
Towards the end of my time there, a few 6-axis robots were also hanging around in the shop annex:
In the first Microfactory post, I described my scant experiences with fabrication— usually in the garage with my dad and some power-tools. So, having more professional means and devices made the school's shop feel like a cathedral for invention, and I spent a great deal of time getting to know the different machines, mechanisms, and methods.
Since we moved into our new (and first) home, I'd naturally been drawn to the idea of using the garage and the basement for a home shop.
Every Shop Needs a Workbench
There was a Sears Grand that went out of business in my hometown in northern Illinois. I think the "grand" stores were Sears' last-ditch effort to combat Walmart... I don't know.
Anyways, it went out of business. During the liquidation sale, my dad was kind enough to buy me a decent collection of tools— lots of Craftsman tool-bags, wrenches, hammers, pliers, etc. I've gradually accumulated a few more tools over the years— mainly from garage and estate sales. I also have an ever-growing collection of scrap electronics— power supplies, motors, LEDs, Arduinos, Raspberry Pis...
Nothing's that big, but it's definitely a lot. And it's taking up a lot of room. The biggest problem that I've encountered is the lack of a work surface. The occasional house centipede coming to visit me from the dark corner of the basement can make soldering on the floor distracting.

Bottom line, it was high time for a workbench.
When my girlfriend's dad heard that we were interested in making one, he suggested we save on material costs and setup his father's bench. His dad worked as a manager along an assembly-line at the Budd Company in Philadelphia. By the looks and contents of the bench, he was also quite handy as a machinist.
Together, we planned out a weekend to drive out to Philly and help Natalie's dad clean off the bench. His parents have both passed away now, so it seemed like a wonderful idea to salvage the bench and carry on the spirit of one tinkerer to the next. Pressure-Washing 🤘
Oil is often applied as a lubricant— and as a medium to carry away heat— when machining or drilling metal. Unfortunately, we found that it can also coagulate into a sticky kind of jelly when it's left to the elements, or pools up.
Natalie's grandpa left all kinds of unusual metal stock and tools in, on, and around the workbench. Uncovering it and cleaning it out felt like exploring the tomb of some metal-working pharaoh.
In a relatively short period of time— maybe 40-to-60 years— there must have been some drastic changes in manufacturing. As we went through the drawers and shelves, the older tools— as well as the hardware and stock pieces— all felt extraordinarily foreign, time-worn and remarkable.
After an hour or so of peeling nuts and bolts out of sticky corners and dusting metal shrapnel into the trash, we finally got to the point where we could actually move the bench out to the yard. Natalie's dad had an idea— to use his power-washer to blast off all the gooey oil— and it ended up being a good one. Animated GIF of the bench being pressure-washed in the yard.

Some of the folks in /r/Workbenches were disappointed that we were cutting away the patina. It is sad to see it go, but it was definitely a quick-and-easy way to get the bench clean— and I'm sure it'll get dirty again soon.
Workbench Installation
That one cleanish spot on the workbench surface is from an incredible cast-iron vise (which Natalie's dad graciously gifted as well). The rest cleaned up nice. We used a scrub brush with some brake cleaner on a set of steel-angle shelves that looked as though grandpa had cut, drilled and bolted together himself. Underneath the table are a set of steel drawers as well, so plenty of storage options.
The legs are made up of a layered, folded steel. It's a unique design, and very sturdy. The top is made up of (3) 2x12s sandwiched together and carriage-bolted down at the top of the legs. I also attached a 2x12 to the piloted holes on the bottom rungs. Natalie's dad figured the legs were purchased from a kit, and he found a second set to take home for his partner Resolute Desk.
When we finally had all the parts moved into our basement, I cut some 2x4s to fit the floor-to-joist height and malleted them tight against the wall. Once those were frictioned into place, I made sure they were plumb and used a couple splice plates at the top to tie them into the joists. After shifting the workbench against the wall, I did some additional leveling with shims and scraps.


I measured some 2-by-4's, cut them a hair long, malleted them to the wall. Then, I screwed in a splice-plate from the stud to the floor joists. There was also a conveniently located junction box where I put in a 4-plug outlet.
Next, I moved the shelves onto the work surface and piloted some additional holes in the steel-angle frame. I put some cabinet screws through the shelf frame and the bench's wooden backsplash. This anchored everything against the wall— and prevented any chance of the shelves tipping forward. Once everything was in place, it certainly felt solid as a rock.
I returned the vise to its former resting place, and found a new use for some under-cabinet LEDs that had adorned the kitchen at our previous apartment. The height of the lights provides a nice, even wash across the work surface.
Lucky for me, there happened to be a junction box right above the top shelf. I bought a pair of outlets and a cover-plate, and rewired the box for a total of 4 local plugs.

Closing Thoughts
So it's not quite a microfactory yet. My imagined robots and CNC mills aren't autonomously spitting out production pieces. Although, I do feel like this was a tremendous step. Hopefully having a nice workspace will provide some momentum for more projects. I'm looking at this old CRT for something... I also have some stepper motors and their drivers that I've been meaning to wire up and test. Anyways, that's it for now. Thanks.

