Goodwill Strikes Again
A symptom of heavy Vim usage is that your brain begins to re-partition old memories for keyboard shortcuts— trashing old brain files for small boosts in finger dexterity.
It was this mass of tangled brains in my own dome that compelled me to purchase a weighty foot-pedal at Goodwill. The model I got is actually a combination of three, springy switches. Sold for the reasonable price of $3.
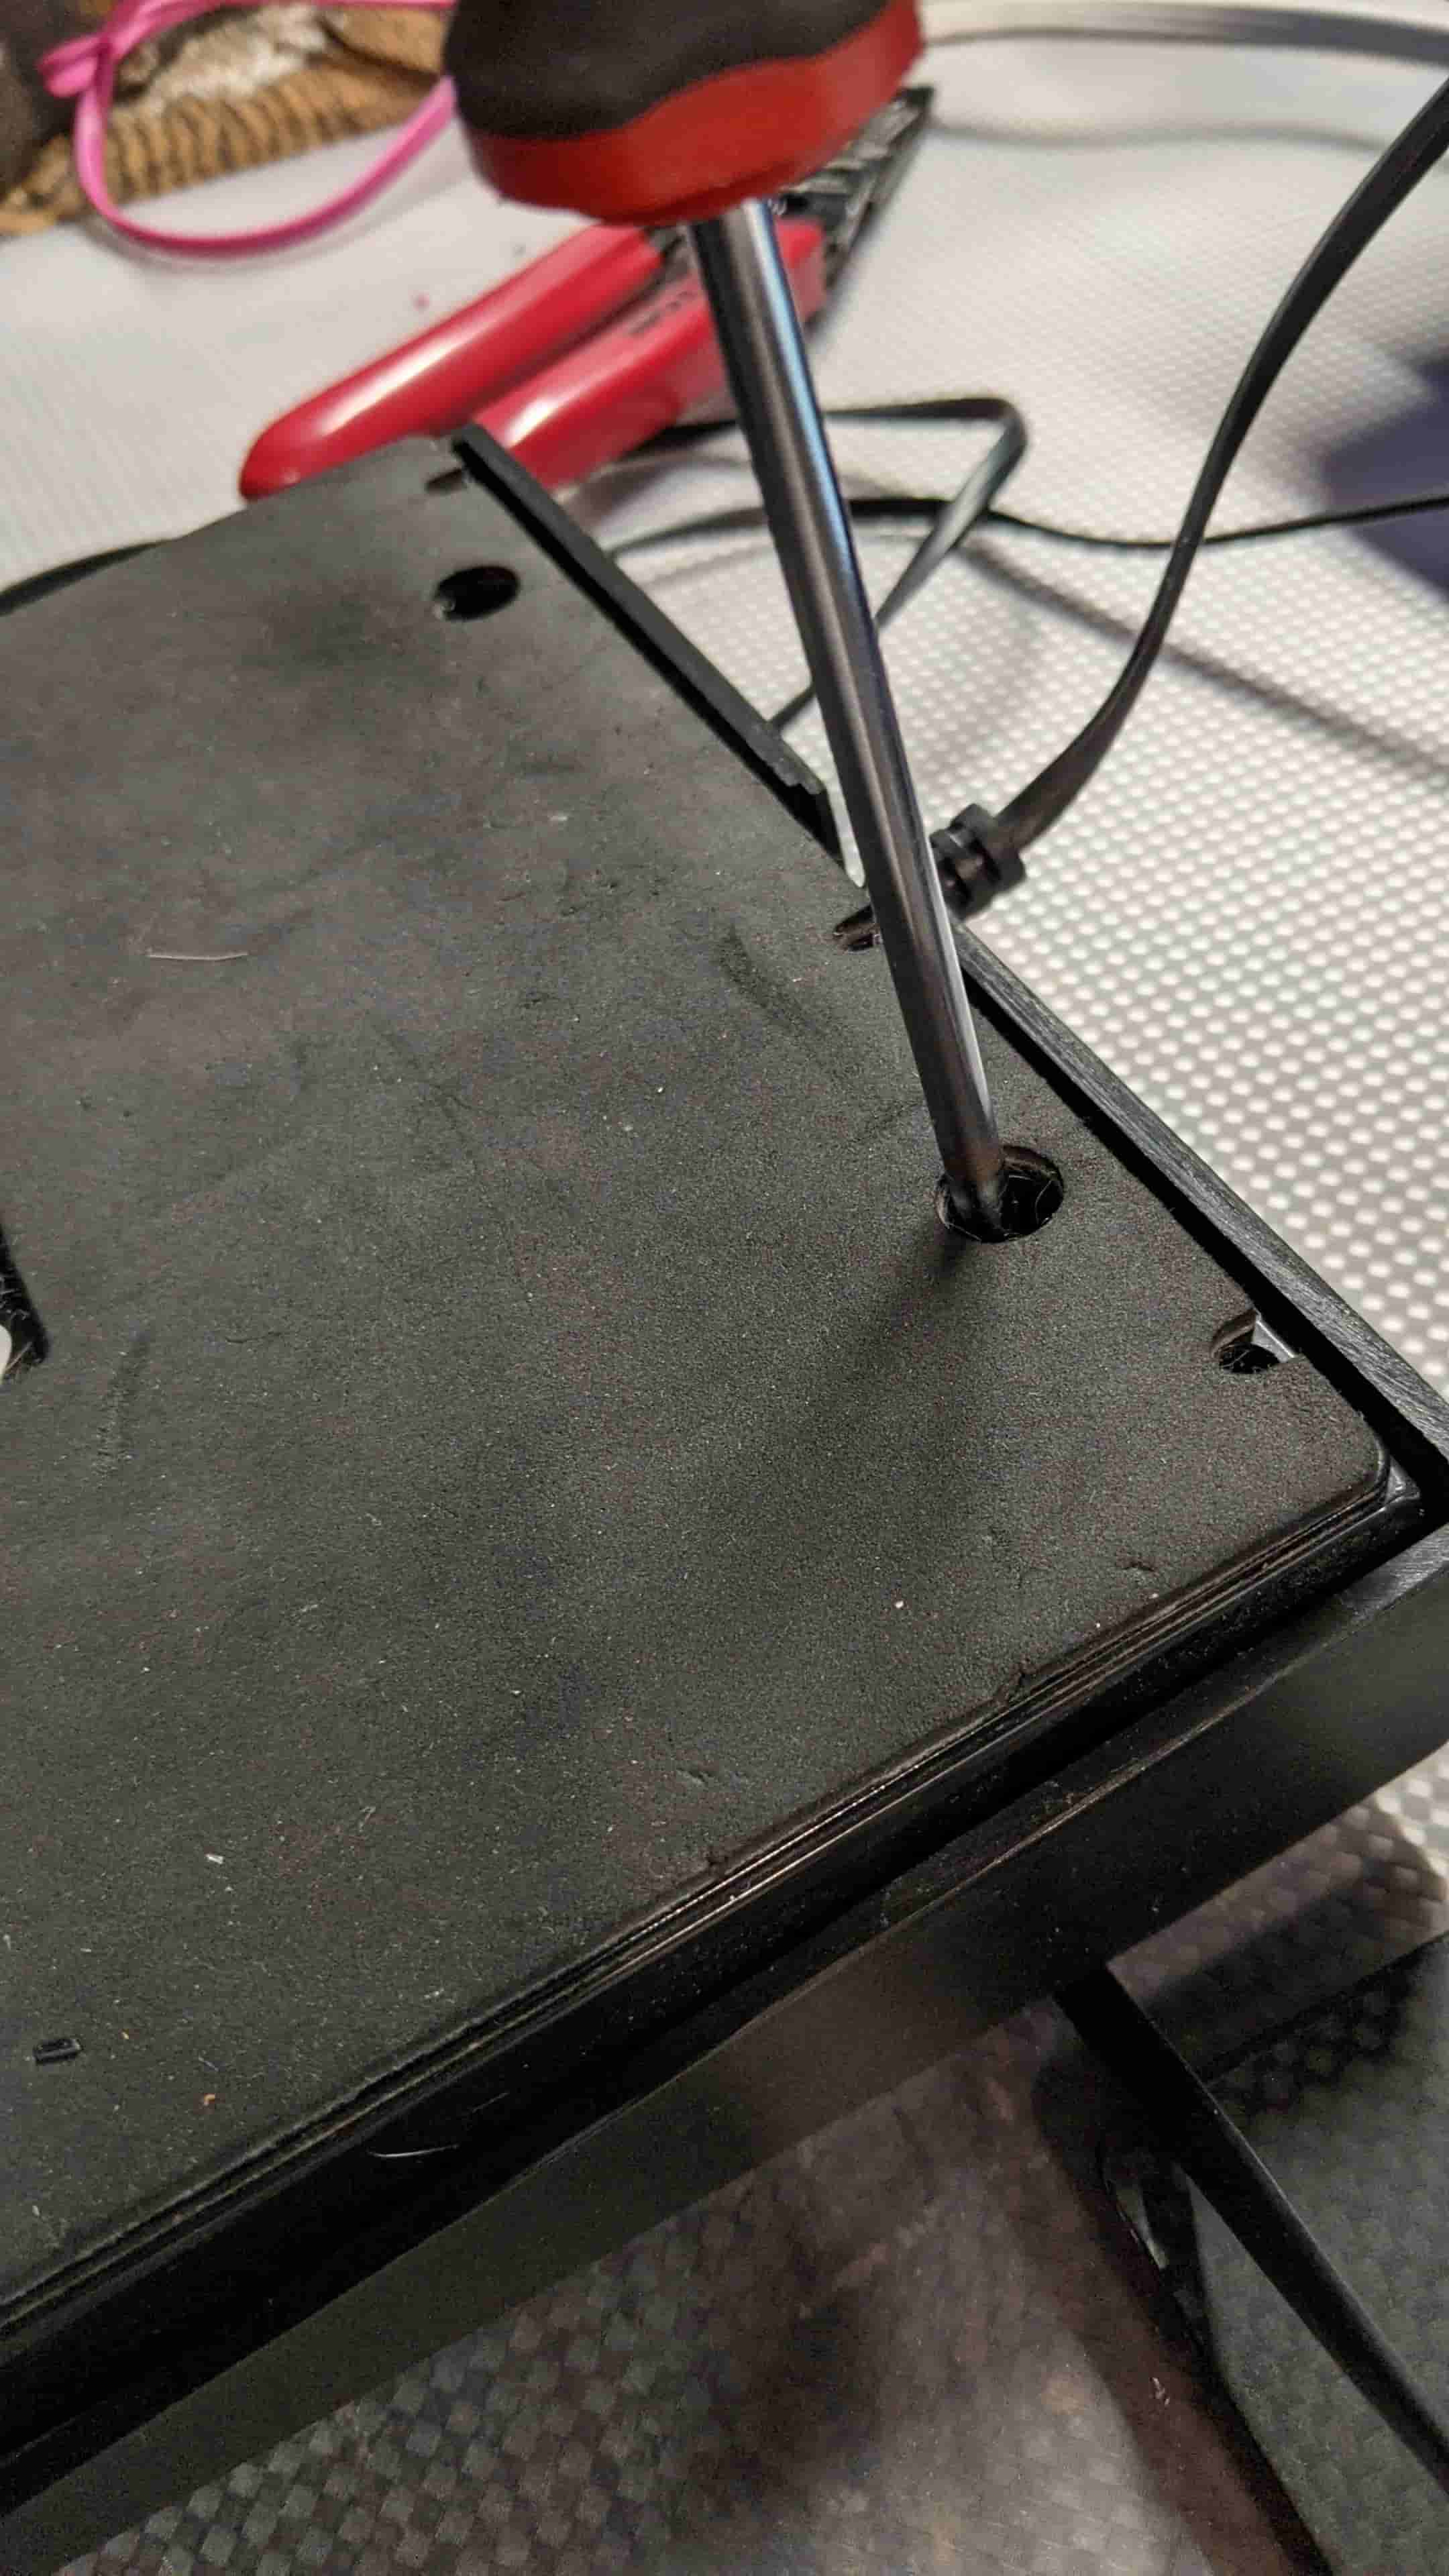
It's a surprisingly hefty contraption. The base is a thick stock of foam that helps keep it from sliding across the floor. It's a clamshell design, sandwiched together by a screw at each of the four corners.
Traditionally, I've coded with my fingers, and my feet remain flat on the floor. The thought of throwing another appendage into the mix had, however, actually crossed my mind (if you can believe it).
The serendipity of discovering the pedal among the other assortment of donated goods gave the idea shape.🦆
What the heck is a Vim Clutch?
Sometimes it feels like we're living in the future. A sci-fi fantasy where you can buy electric cars with digital coins and speculate on blockchains founded on memes.
Unsurprisingly, I'm not the only one under the Vimperious curse... (yes, that was a Vim + Harry Potter pun) In fact, there have been a good many other model Vim Clutches:


Looking at these examples, it's clear that a Vim Clutch can assume many forms. At its core, a Vim Clutch is a pedal that engages or disengages the INSERT mode in the Vim editor. In Vim (Visual-editor IMproved) you can type i,I,a,A, or a few other keys to enter INSERT mode, pinning the cursor to specific starting locations.
INSERT mode lets you type normally— like you would in a Google doc or in Notepad. Pressing the Esc button brings you back to NORMAL mode...

If you've used Vim, then you know NORMAL mode is anything but "normal". You can jump to matched characters, do clever search and replace maneuvers, build macros on-the-fly and much much more from within NORMAL mode.
A proper Vim Clutch would have to take the place of one of the INSERT-enabling and disabling key presses. Depressing the pedal would enter INSERT mode, and releasing the pedal returns to NORMAL mode.
Instead of settling into a cubicle'd menagerie of isolated and burnt-out developers, the Vim Clutch puts you in the cockpit with Vim Diesel— racing stick, staying above 50 words-per-minute to save all the innocent bus riders.
So that's the "what" and the "why", but before I give you the "how"— If you've made a dope Vim Clutch, and you're not in the list— what gives?? Leave a comment, paste in some links or images. I'll put it in with the others.
Vim-Clutch Hardware
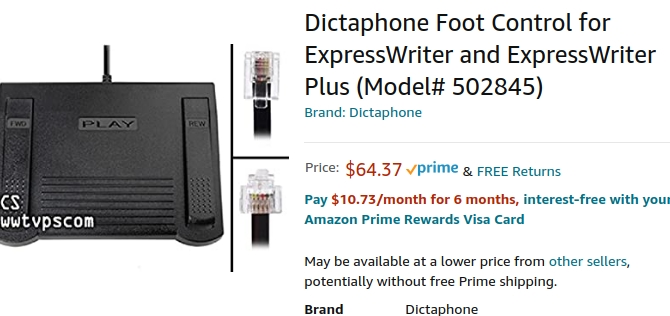
The Goodwill pedal had about 4-feet of flat, fettuccine-looking cable coming out the back. It terminated in a telephone jack. After a quick Google search, it seemed like the pedal would have been used to control playback on a transcribing machine.
You'd engage the center pedal for normal playback, step on the left pedal to rewind, or step right to fast-foward while listening to a recording of speech. It would've provided a quick way to navigate (probably a casette) back and forth while simultaneously having both hands free to type out the actual letters and spellings of what was said— at a keyboard or electric typewriter, I'm guessing. Similar models go for a decent chunk of change on Amazon:
All the more re-assured by the deal that I got, I decided to hack it apart and see what was happening inside. The previous owner definitely had cats. The insides contained a treasure-trove of hair, whiskers and dust bunnies.
There were two metal weights affixed to the bottom-half of the clamshell. They keep the pedal from scooting across the floor. Springs at each of the switches set-off the plastic pedals from engaging the switch mechanism. I looked up the string of numbers and letters that are printed on the side of each of the switches (out of curiousity); but no conclusive result about the design or manufacturer. The pedal itself has no distinguishing brand markings.
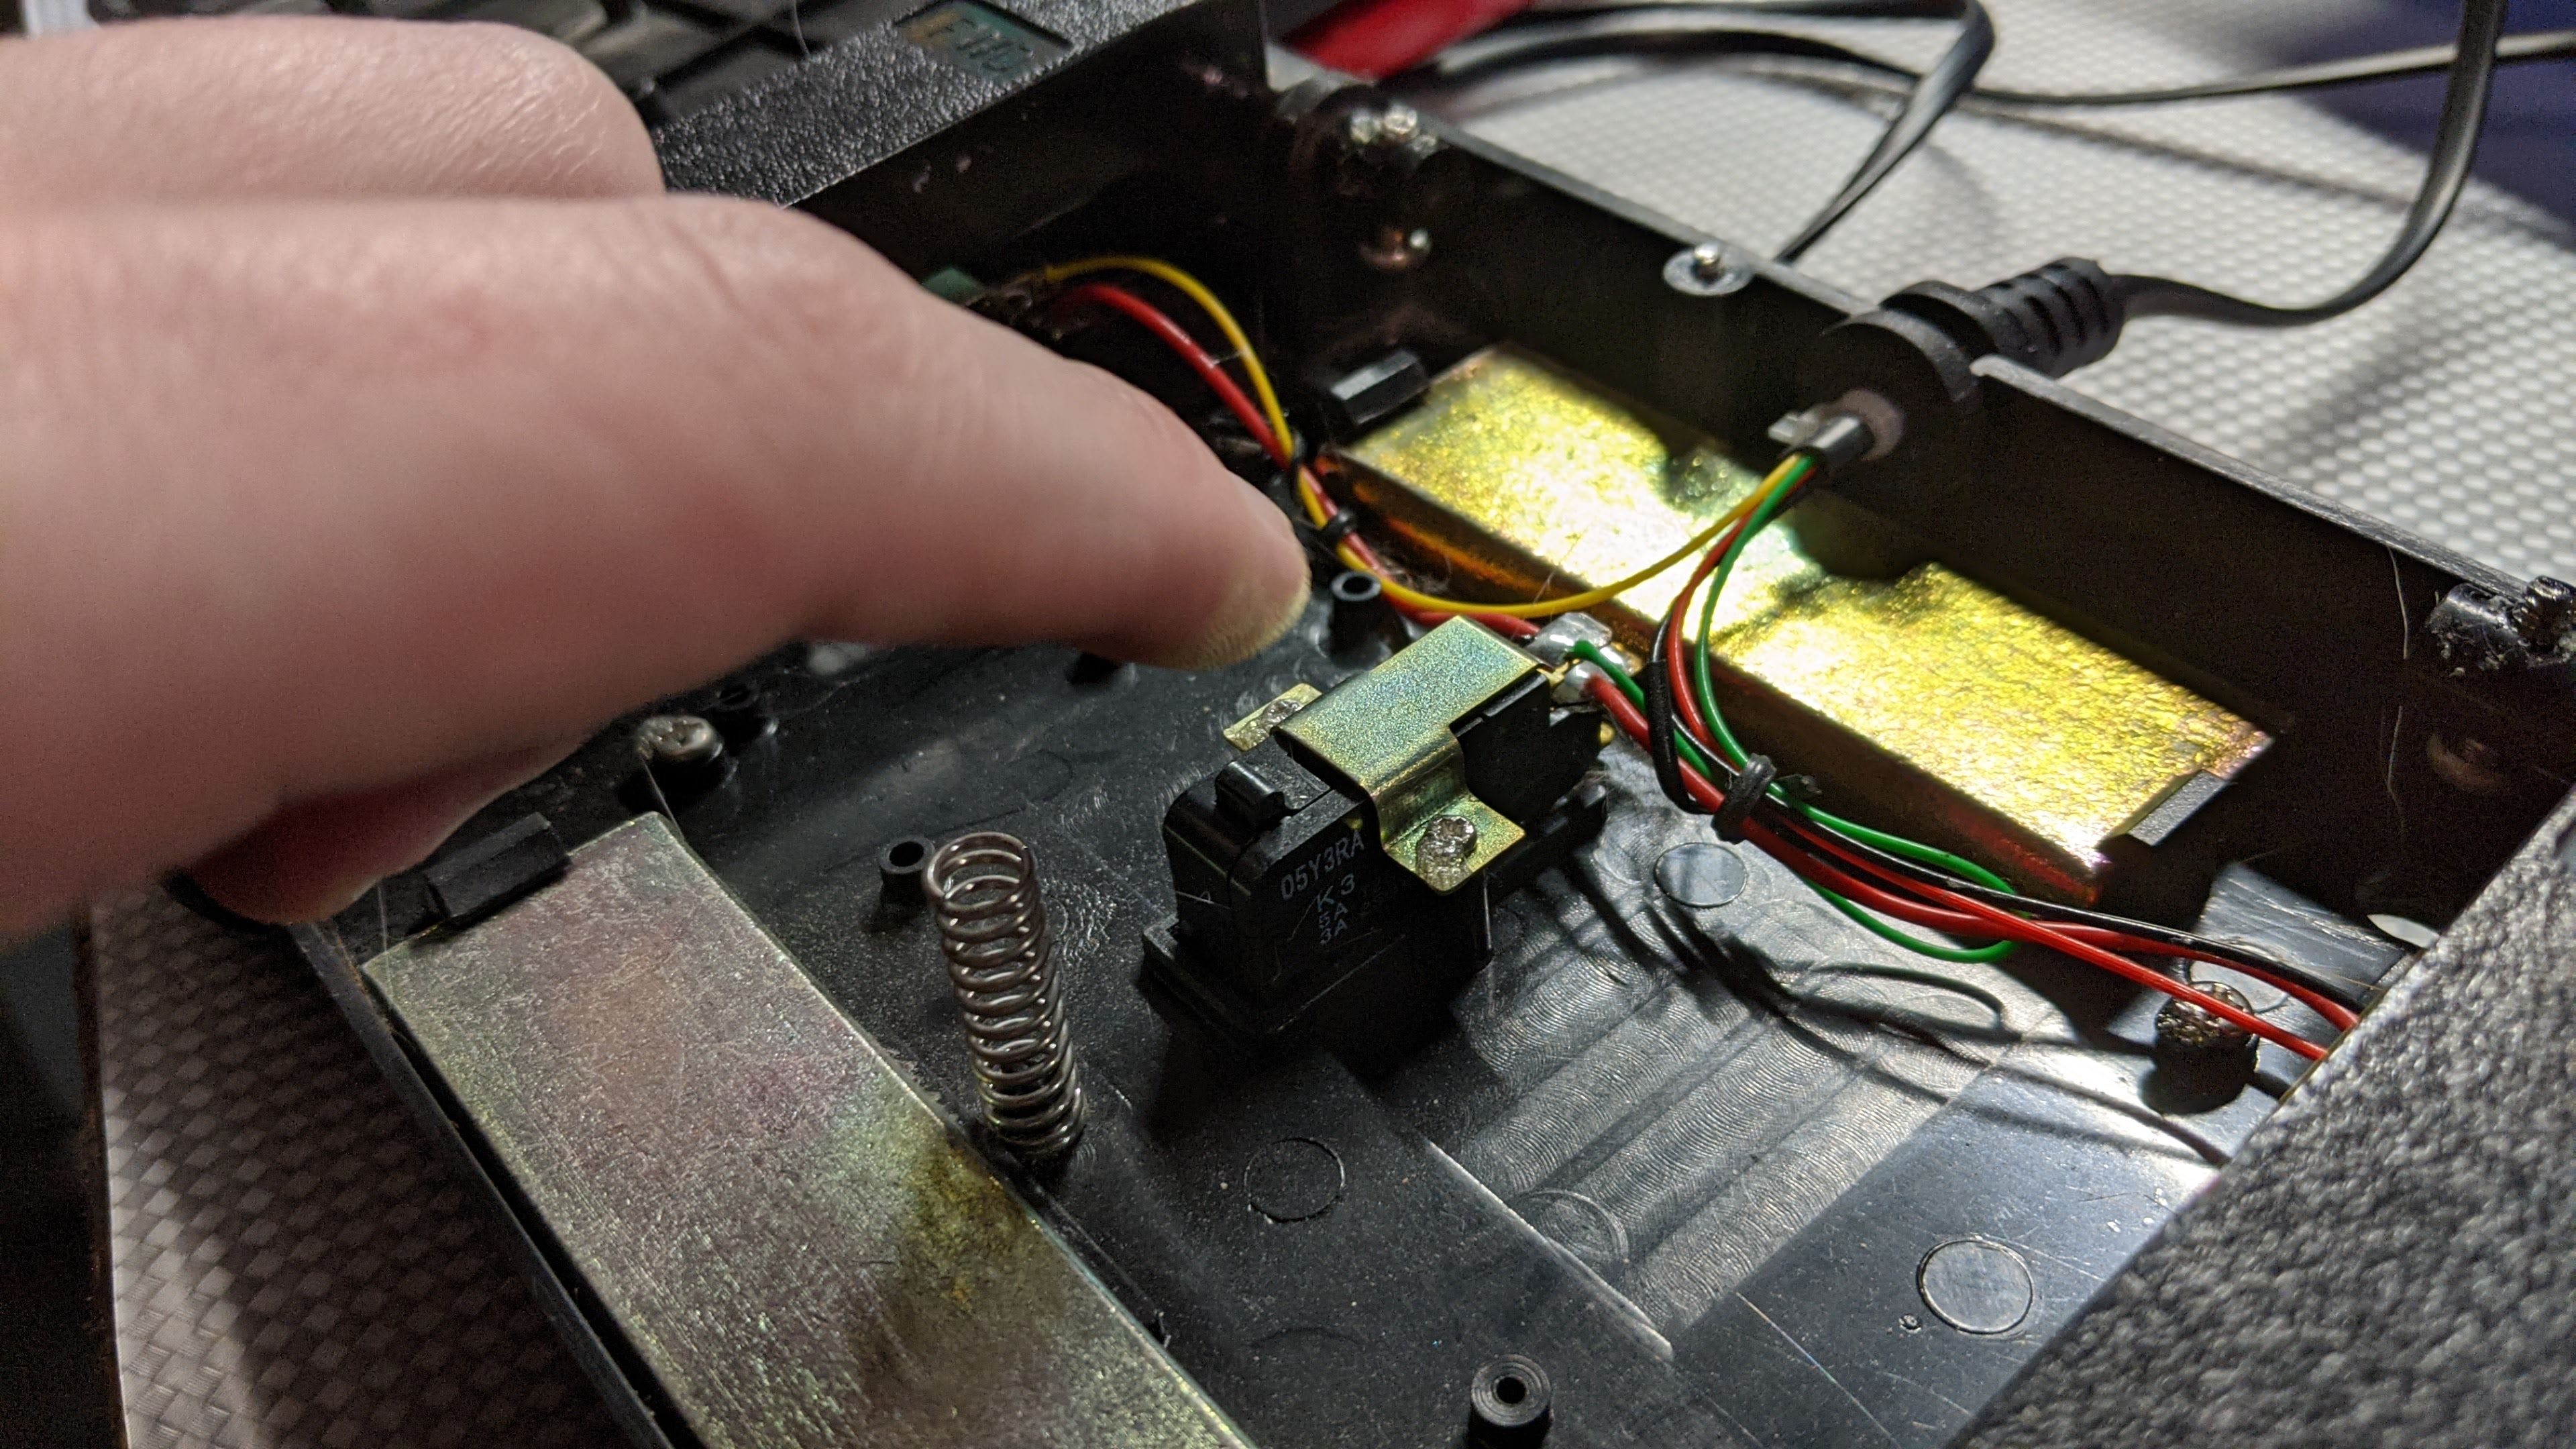
The springs are were also an exciting find. They could probably be swapped out, giving some control over the quality of the pedal's action. After playing with it, I feel like it'd be more comfortable to have a stiffer press. Right now, the weight of my foot is enough to create an accidental key-click.
A Controller: RPi Zero
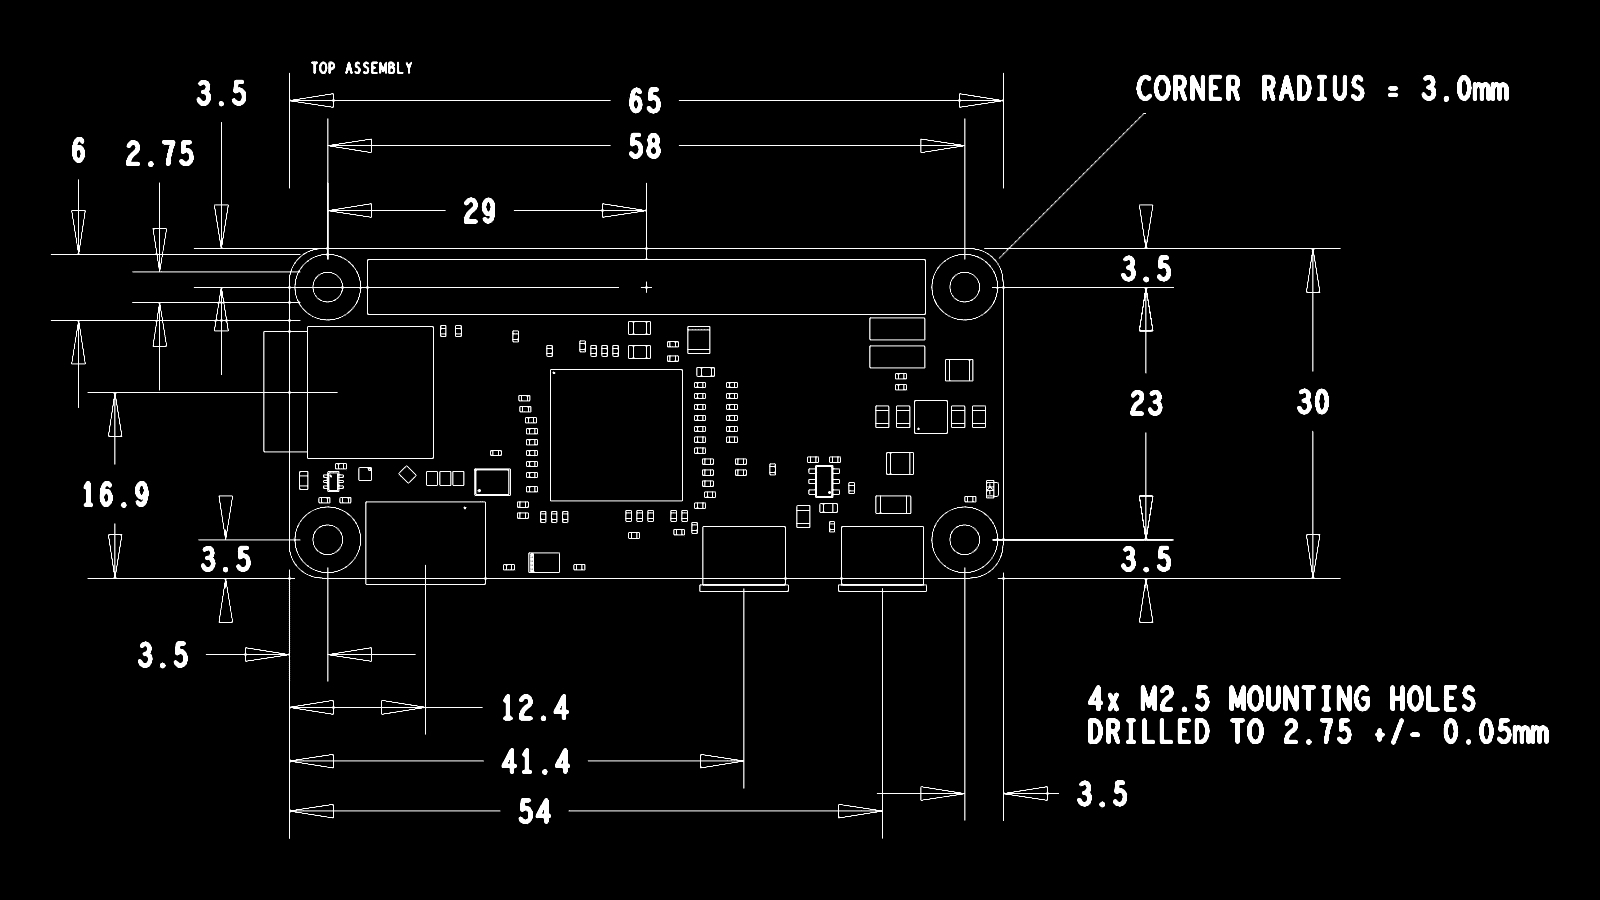
We'll have to add $10 to our budget. I decided to use the Raspberry Pi 0 for the keypress controller— the thing that'll turn our pedal presses into "i" and "Esc". That's $13 total… still worth it. I had a couple of the Pi 0 SBCs lying around from projects past, so it was a convenient option.
The Raspberry Pi 0 was a go-to board for some of my school projects in the past. I like the Zero model a lot. It's insane to have a programmable device that can use a display, provide WiFi and an SSH connection, GPIO and more for such a low price. Plus it's about the size of a few sticks of gum! Which is more than small enough to fit comfortably within the foot-pedal casing.
So now it's a project. I think the Pi will come in handy if I ever want to try sending keypresses via Bluetooth. Could you imagine that? The first (AFAIK) wireless Vim Clutch. That would be legit. We'll see. Probably don't have the energy. I don't know, maybe that would be worth it…
Bottomline, the Pi 0 gives you a lot of flexibility in an exceptionally tiny form-factor. The physical interfaces of the Pi 0 are diverse and low-profile— the micro-USB is convenient for simultaneously powering the device and sending data.
In the past, I'd tried setting up the headless Pi 0 using a single USB for both data and power. The tutorials online seem super straight-forward and fool-proof; but I've still never gotten it to work seamlessly.
The first Pi Zero I bought as a kit with all the silly dongles and adapters to plug in a mouse, keyboard, and display. I had more resolve to get it working this time, but still got into some muddy waters with setting up the Ethernet gadget for SSH'ing over USB.
A useful, succinct tutorial by Andrew Mulholland provides the basic documentation for setting it up. There's also a good one from Adafruit that provides more context for Mac and Windows users. Most people seem to get it working by following those directions, but it always gets a little sticky for me.
Raspberry Pi OS Config
On Linux (Ubuntu 20.04), I would install the Raspberry Pi Imager with aptitude:
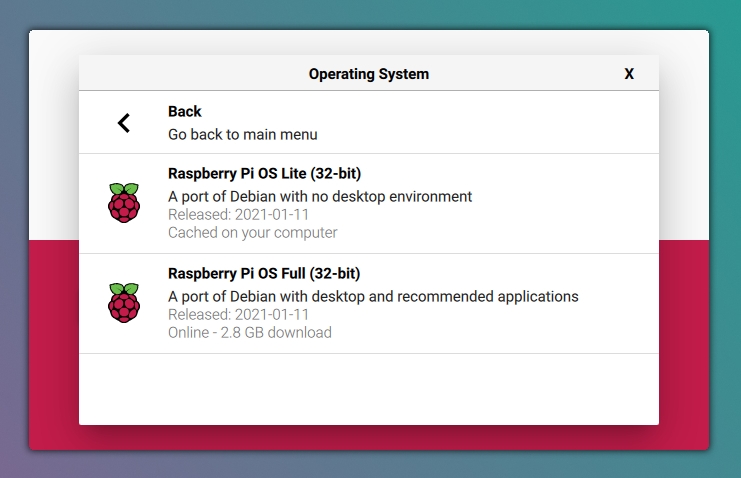
sudo apt-get install rpi-imagerThe RPi Imager has become incredibly easy to use and gives you a nice pre-populated catalog of compatible OS's. I was able to quickly flash "Raspberry Pi OS Lite" after selecting it from a menu of recommended options. I used an 8GB micro-SD card (probably overkill for this project).
After flashing the SD card, it'll prompt you to eject it. I just pop it out and back in. You'll probably see two things: rootfs and boot. The next step is to open boot, then edit config.txt.
At the bottom of config.txt, add a new line:
dtoverlay=dwc2Next, you have to edit the cmdline.txt file. As Andrew pointed out in his gist
, each parameter is separated by a single space (no new lines). In here, you will insert the following after "rootwait":
modules-load=dwc2,g_etherAfter this, you should be able to plug in the Raspberry Pi 0 with a micro-USB cable (making sure to use the port that isn't the power port) and SSH into pi@raspberrypi.local as a USB Ethernet gadget. I managed to get this "working" in a hacky sort of way (helped along by this blog post
), but ultimately removed the "g_ether" option and configured the Pi to SSH over my local WiFi instead.
Maybe one day I'll get it to work on the first try. Configuring the Pi to connect to the Wi-Fi network
is a perfectly acceptable alternative solution. On a running Pi, you would use sudo raspi-config to configure Wi-Fi and other important options— like language and locale.
Alternatively, you can create a file on the micro SD card called wpa_supplicant.conf:
sudo vim /etc/wpa_supplicant/wpa_supplicant.confIn this file, include the 2-letter ISO code for your country as well as the SSID and password of your network.
country=US
network={
   ssid="Chance the Router"
   psk="CocoabutterKisses"
}
If you have other Raspberry Pi computers on the network, I recommend you turn them off or disconnect them temporarily (unless they have a different host name). I had a Pi 4 that was already broadcasting as raspberrypi.local and it was another stick in the spokes. I've since set the newly-connected Pi's hostname as vimclutch.local.
One last recommendation (just to make your life easier)— don't go crazy with the password. I had a whacky password with a double-quote or something stupid, and I'm still convinced it was the culprit after going down yet another debugging rabbit-hole.
Software
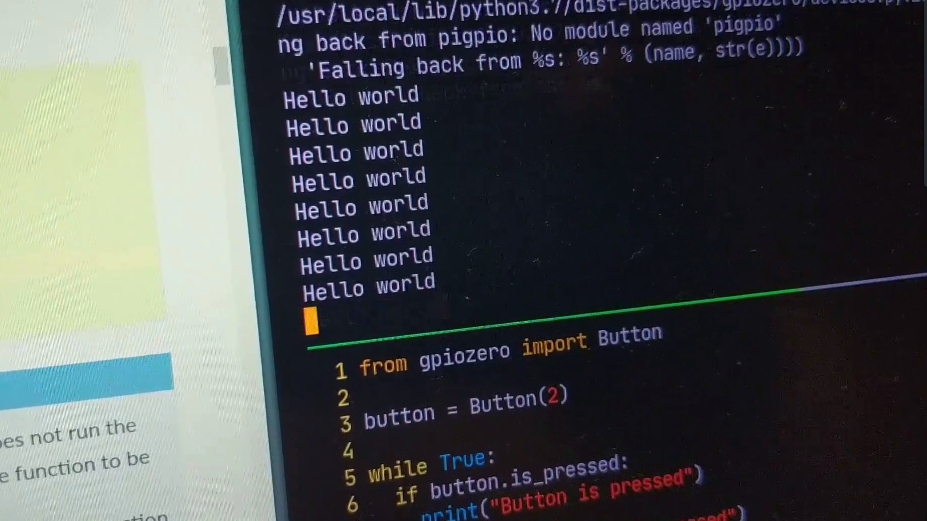
One last excuse to use the Pi (rather than an Arduino, for example) was that it gave me a chance to try out some of the GPIO Python libraries. The one I ended up importing is gpiozero .
This library provides a ton of convenient features around the "Button" object. A gpiozero "Button" is instantiated with the GPIO pin number— for example, pedal = Button(2). It accepts a few other parameters that will dictate the Button's attributes and behavior.
You can then use methods like: pedal.is_pressed, pedal.is_held, pedal.when_released, and much more. Have a look at the Button-specific documentation
for a full list of capabilities.
Setting a Button() lets the script detect that the 5V boolean "high" signal "is_pressed", or "is_released". Now we have to turn that "high" or "low" into keypresses. The script below opens the Pi as a human interface device (HID) that sends emulated keypresses (as structs) to the computer the Pi is plugged into.
def press(char):
    mod,key=hid_codes[char]
    raw=struct.pack("BBBBL", mod, 0x00, key, 0x00, 0x00000000)
    with open("/dev/hidg0", "w") as fd:
        fd.write(raw)
        fd.write(struct.pack("Q" 0))
        sleep(0.005)
The struct library interprets Python bytes as packed binary data. The weird "BBBBL" pattern is just dictating 4 unsigned chars (BBBB) followed by one unsigned long (L) integer. The code is bummed a little further than some other examples I've found (mostly using Python's write_report function. I ripped it from a rather cool presentation, One Device to PWN Them All).
The gist of the function above is that we're able to build the unreadable keypress signals (one long string of bytes) by referencing the readable character (i.e., the letter "o" or "i") in a lookup table. The lookup table packs the bytes for that key and its modifier (i.e., Shift or Ctrl) into the longer struct. If there's someone smart reading this article, they can please explain this better.
As far as how those binary bits are actually interpreted as keypresses, I'm not sure how that works…
Before this script will work, we need the Pi to say, "hello, I am a keyboard", whenever it's plugged into another computer via USB. I put a link to the blog post with the relevant script (as well as a few other useful links) in the footer to this project's GitHub README . Here it is below as well:
#!/usr/bin/env bash
cd /sys/kernel/config/usb_gadget/
mkdir -p vimclutch
cd vimclutch
echo 0x1d6b > idVendor # Linux Foundation
echo 0x0104 > idProduct # Multifunction Composite Gadget
echo 0x0100 > bcdDevice # v1.0.0
echo 0x0200 > bcdUSB # USB2
mkdir -p strings/0x409
echo "fedcba9876543210" > strings/0x409/serialnumber
echo "l00sed" > strings/0x409/manufacturer
echo "VimClutch USB Device" > strings/0x409/product
mkdir -p configs/c.1/strings/0x409
echo "Config 1: ECM network" > configs/c.1/strings/0x409/configuration
echo 250 > configs/c.1/MaxPower

# Add functions here
mkdir -p functions/hid.usb0
echo 1 > functions/hid.usb0/protocol
echo 1 > functions/hid.usb0/subclass
echo 8 > functions/hid.usb0/report_length
echo -ne \\x05\\x01\\x09\\x06\\xa1\\x01\\x05\\x07\\x19\\xe0\\x29\\xe7\\x15\\x00\\x25\\x01\\x75\\x01\\x95\\x08\\x81\\x02\\x95\\x01\\x75\\x08\\x81\\x03\\x95\\x05\\x75\\x01\\x05\\x08\\x19\\x01\\x29\\x05\\x91\\x02\\x95\\x01\\x75\\x03\\x91\\x03\\x95\\x06\\x75\\x08\\x15\\x00\\x25\\x65\\x05\\x07\\x19\\x00\\x29\\x65\\x81\\x00\\xc0 > functions/hid.usb0/report_desc
ln -s functions/hid.usb0 configs/c.1/
# End functions

ls /sys/class/udc > UDC
Save this script to /usr/bin/vimclutch_usb on the Raspberry Pi Zero (or give it another name). It also needs to be made executable:
chmod +x /usr/bin/vimclutch_usbThen put a line in /etc/rc.local (before the exit 0 line) that will allow the script to be automatically run, setting up the Pi as a USB keyboard:
...

+ /usr/bin/vimclutch_usb
exit 0Soldering
The fettuccine cable running out the back of the pedal was removed. I severed the leads from the switches, and soldered them directly to the GPIO pins (2, 3, and 26) of the Pi. I also soldered the thicker red wire to the Pi's 5V out, and closed the other end of the loop to ground. Depressing any of the three switches now closes the circuit with its specific GPIO pin.
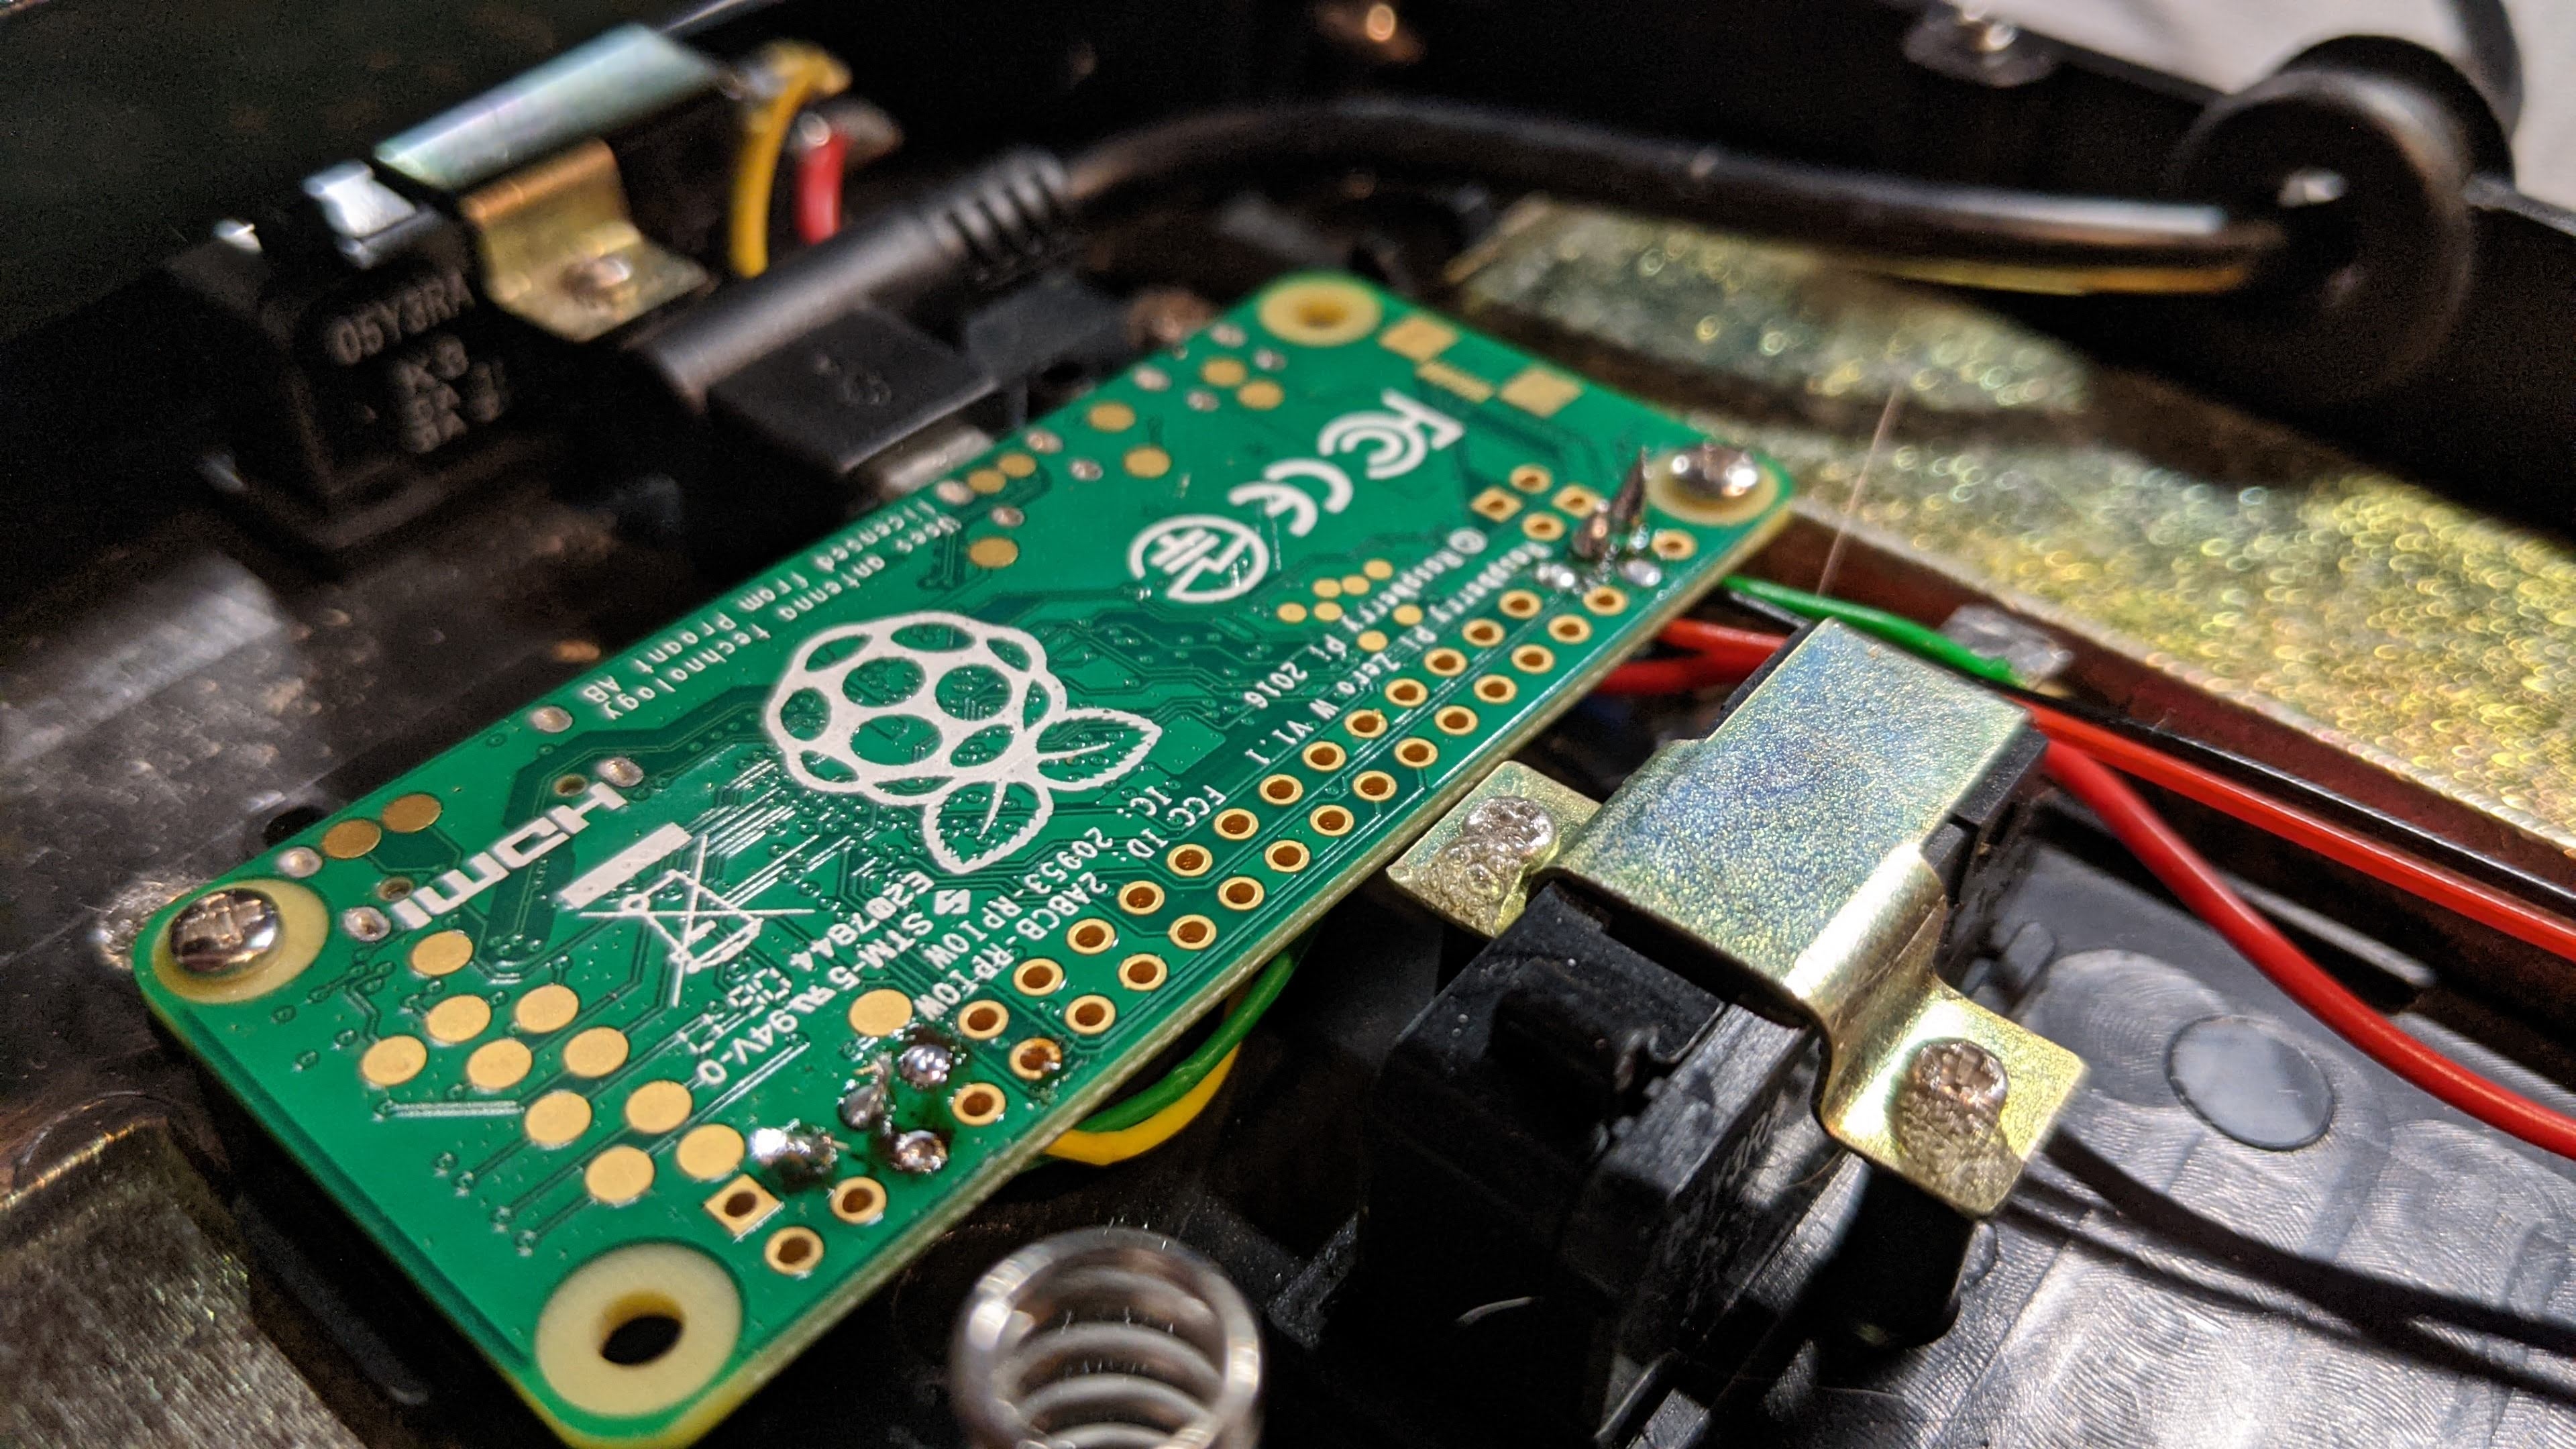
To keep the Pi firmly in place, I drilled some holes through the base of the pedal and mounted the corners of the board to two standoffs. The single USB cable connects to the side of the Pi and exits out the same hole in the back— protected by a rubber grommet.
I've been using the pedal to code for about a month now, and it really is a lot of fun. It took some getting used to at first, but after a couple days practice it's easy to build up the muscle memory. It also incentivized me to learn about the different ways to enter INSERT mode— I had no idea about SHIFT+a until I looked it up for this project!
Unfortunately (after a couple weeks of usage) the main center pedal's switch started to get a bit funky… might just be a bad solder joint; but hopefully the switch isn't faulty. Luckily I could just SSH into the pedal and swap out the keys. I still have the right and left working swimmingly.
Conclusion
This has been an enlightening project. I think it's given me a lot of useful knowledge that I will carry forward in my future projects. Excited to be doing more with electronics and linking physical interactions with digital events and vice versa.
Until then, thank you so much for taking a minute to share my excitement over this project. Like I said earlier, if you've made a Vim Clutch, or another bonkers HID, please share a link in the comments! Happy coding.

